Request/Management
Types of Analysis for Request
1)Diagnostic Immunology, 2)Clinical Chemistry, 3)Diagnostic Hematology, 4)Molecular Genetics, 5)Mass Spectrometry, 6)Electrophoresis, 7)Latent Tuberculosis Infection, 8)Microorganism, 9)Pathology Test
Instructions for Completing Analysis Request Form
Fill in the necessary information using the appropriate MEDICHECK Lab program for the requested test.
- Analysis :Register analysis using the computation program
- Department :Institution name, department, and physician
- Sample Information :Name, gender, age, pregnancy (female), receipt no., etc.
- Sample :Sample types, area (cell, tissue), collection date and time, request date, etc.
Sample Collection Method
- Sample :Collect each sample according to the tests by the MEDICHECK Lab.
- Container :The name, age, gender, and receipt number must be written on the label attached to the container.
- Number of Samples :When requesting more than one sample from the same examinee, please write the name of each sample and test on the label.
Sample Submission and Transportation
Samples needing special caution(e.g., refrigerated transportation, immediate transportation) in the sample submission and transportation must follow the guidelines for each test on the MEDICHECK Lab “Test Guide Booklet.”
Please submit the sample to the responsible personnel at each branch to be sent to the personnel of the sample transport company. The submitted samples are immediately collected and sent to MEDICHECK Lab to be analyzed the next day.
Request for Additional Analysis
If requesting for additional analysis, please contact MEDICHECK Lab to check if it would be possible.
If the analysis takes one day and is received before 5 PM, the test will be completed by noon the next day.
- Scheduled tests are analyzed according to the date of the test and the time required for each test based on the test guideline.
- If the sample has been seriously contaminated or altered, it cannot be analyzed. In this case, we request to redo the sample collection.
- If the sample amount is insufficient, reanalysis and additional analysis cannot be performed.
- Please make inquiries to the MEDICHECK Lab for any urgent or other inquiries.
Report
The result can be retrieved in real-time via the computer network at the corresponding branch. The report can be printed via the computer network of the KAHP program and the format is in the KAHP report format.
- Sample Guidelines
- Molecular Genetics
- Blood Test
- Latent Tuberculosis Infection Test
- NK Cell Activity Test
- Microbial Test
- Histopathology & Cytopathology
- Precautions for Protection of Medical Workers
Sample Guidelines
Sample Preparation
| Tools Needed | How to Use Tourniquet |
|---|---|
|
|
How to Collect Sample
- Check the patient
- Check if they have fasted
- Place the patient’s arm on a table (same level as the heart) and apply and tie the tourniquet above the puncture site.
- Sterilize the site with an alcohol swab and let the area dry.(If the alcohol doesn’t dry, this can cause hemolysis in the blood sample.)
- Inject the needle at a 15-degree angle with the surface of the arm.
- Syringe
- Collect blood by slowly pulling the plunger. If the plunger is pulled back too quickly, it may cause hemolysis.
- Collect blood enough to fill the serum separator tube.
- Serum Separator Tube
- Fix the holder and slide in the tube. After blood is drawn, carefully take the tube out.
- Remove the first tube from the holder and slide in the second tube for the next blood collection.
- While the tube is inserted, do not pull out the needle from the blood vessel.
- Syringe
- Once blood is being drawn, untie the tourniquet.
- Remove the needle and compress the puncture site.
- Please notify the doctor if there is excessive bleeding (5 minutes or more) and blood in the serum tube does not coagulate.
- The used needle must be disposed of in the sharp container.
- Invert the tube for the blood to mix well with an anticoagulant.
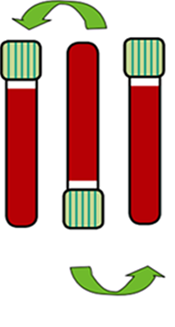 Mixing 1 time
| Tube Name | Color | Assay | Mixing | Additives |
|---|---|---|---|---|
| Sodium Citrate |  |
PT/aPTT, Special Coagulation Assay, Blood Clotting Factor | 4 times | 3.2% Sodium Citrate |
| Plain |  |
Blood typing, Drug | 5 times | Clot activator |
| SST |  |
Biochemistry, Serology | 6 times | Clot activatior & Acrylic gel |
| PST |  |
Emergency Biochemistry | 8 times | Lithium heparin & gel |
| Heparin |  |
Blood Gas | 8 times | Heparin |
| EDTA |  |
Blood Test | 8 times | Spray-dried K2 EDTA |
| Glucose |  |
Glucose Test | 8 times | Sodium Flouride & Na2 EDTA |
| NK Vue |  |
NK Cell Activity Test | 10 times | NK Cell activator |
| STANDARD ETB-feron |
 |
Latent Tuberculosis Infection Test | 10 times | CFP-10, ESAT-6, TB7.7 |
Order of Draw
- 01

NK Cell activator
(1mL) - 02

S/C
(2.7mL) - 03

Plain
No specific order
(6mL) - 04

SST
(5mL) - 05

Heparin
No specific order
(10mL) - 06

PST
(4.5mL) - 07

EDTA
(3mL) - 08
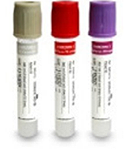
CFP-10, ESAT-6,TB7.7
Gray → Red → Purple
(each 1mL)
Centrifugation & Storage
- Gently mix for blood to coagulate by the clot activator applied on the inner walls of the serum separating tube (SST) then store it standing up for 30 minutes to 1 hour at room temperature.
- The sample must be stored at room temperature (15–25℃) before centrifugation as refrigerating (4℃) whole blood when serum is not yet separated lead to plasma K level increases by about 0.2 mmol/L in an hour.
- Separate the serum by using a centrifuge for 10 minutes at 1300–2000 RCF (g) within 2 hours while the sample is coagulated.
- If the centrifuge is not yet ready, coagulate the sample at room temperature for 30 minutes to an hour and quickly centrifugate the separated plasma at the top.
- Store in a refrigerator after centrifugation then make the request.
Molecular Genetic Test
- Apo E test samples are collected in EDTA tubes. Collect 2 mL of blood to an evacuated tube, then immediately tilt the tube up and down 8 to 10 times to mix the EDTA and blood to prevent partial coagulation.
- Tubes dedicated to the test must be used for HPV-related tests.
- As a rule, SST without anticoagulant must be used for tests related to hepatitis virus.
- RNA quickly degrades in HCV RN tests and blood should be collected and requested on the same day.
- Hemolyzed sample among the samples requested for analysis of RNA virus produces unstable results.
- For tests on genetic diseases or other tests requiring caution, be sure to write the clinical findings and the purpose for the request on the request form for genetic tests and submit it with the genetic test consent form.
- Samples are refrigerated while being stored and transported.
Blood Test
- It is recommended to prepare the peripheral blood smear slide within 3 hours of blood collection.
- Write the examinee information (requester, examinee name, gender, age, etc.) with a pencil in the dark area on the right side of the slide.
- Dry the blood smear slide thoroughly, place them in the slide case, and send them with the CBC samples.
- Place a drop of blood about 1 cm from the right end of a clean glass slide.
- Have another slide come in contact over the blood drop in 30–45°.
- As the end of the slide is being pushed, the blood spreads along with the slide and immediately smears at a constant velocity and angle.
- About 3–4 cm for the length of the smear is appropriate and it must be quickly dried.(Not drying quickly can lead to changes in the shape of the cells.))
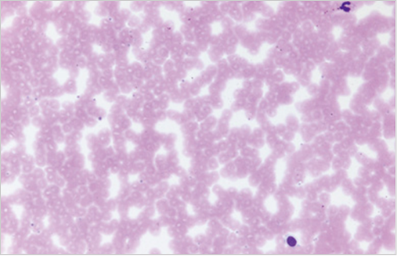
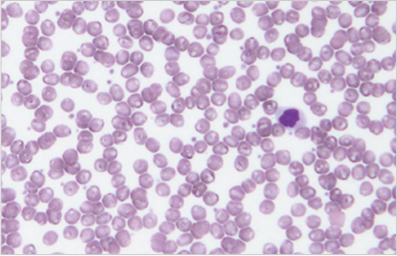
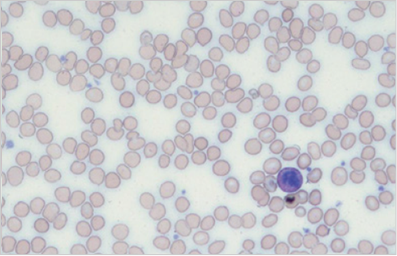
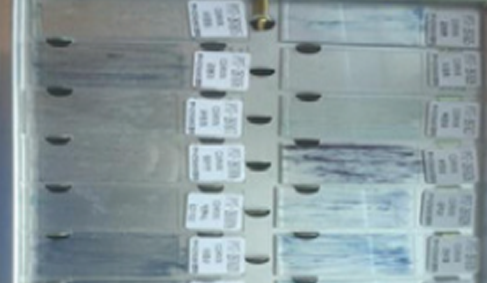
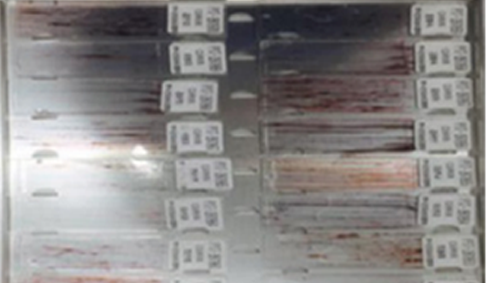
Common Inadequate Peripheral Blood Smear Slides
- Visual Inspection of the Blood
-
If the surface of the spreader slide in contact with the slide is broken or rough
-
Irregular velocity of the smear
-
Blood does not sufficiently spread on the surface of the spreader slide
-
An insufficient amount of blood dropped on the slide
-
Blood does not spread accordingly to the width of the slide
-
The slide is not clean or it is oily (when there is a high lipid component in the blood)
-
The pressure between the slide and the spreader slide is not constant
-
Late smear after dropping blood
-
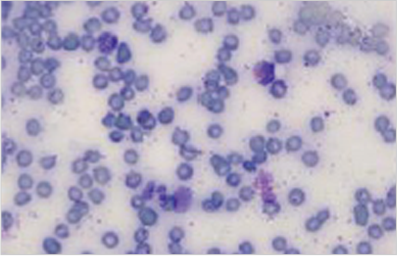
- Blood Cell Shape of Inadequate Slides
- Artifact due to humidity on the slide surface or late drying
- Problem : Unable to observe the shape of red blood cells
- Solution : Immediately dry after smearing and ensure the surface of the slide is not exposed to humidity.
- Artifact due to formaldehyde
- Problem :The slide turns to foggy and blue after Wright staining
- Solution : Place the slide inside a plastic bag to minimize exposure and store it separately from tissue samples.
- Artifact due to humidity on the slide surface or late drying
Latent Tuberculosis Infection Test
- The blood collection tube must be stored at the temperature range of 2–25℃ and placed at 15–25℃ before the blood draw.
- Please make sure to follow the order of the blood draw.(If the order is changed, it can lead to inaccurate results due to contamination.)
- Nil(Gray) → TB Ag(Red) → Mitogen(Purple) - Please make sure to follow the amount of blood drawn as an insufficient amount of blood may not collect the appropriate amount of blood which will alter the result.
- Keeping blood samples under cold conditions for optimal reaction.
- Shake 10 times after blood is collected to avoid air bubbles, then store at 15–25℃.
- Start the incubation within 16 hours after the blood collection.
- The tubes must be kept at 15–25℃ before placing them inside the incubator.
- Incubation Temp.: 37±1℃(Tubes should be incubated upright.)
- Incubation Period: 16–24 hours
- If the samples cannot be centrifuged immediately after incubation, they can be stored for up to 1 day at 2–25℃.
- Centrifuged plasma can be stored for up to 7 days at 2–8℃.
- Do not store whole blood samples in the refrigerator or freezer before incubation.
- After incubation, centrifuge at 2200–2300 RCF (g) for 15 minutes.
NK Cell Activity Test
- NK tubes that have been refrigerated should be used immediately after taking them out.
- Collect 1 mL of blood up to where the black line is marked on the blood collection tube.
- When various types of tubes are used, blood should be collected first in NK tubes.
- When blood is collected and dispensed with a syringe, make sure to open the cap of the NK tube and dispense a fixed amount.
- Invert 10 times after blood is collected.(Do not use rollers.)
- Start the incubation immediately after collecting blood. It is recommended to incubate within at least 1 hour as activity is maintained up to 30 minutes after blood collection but the levels may be affected afterward.
- Incubation Temp.: 37±1℃(Tubes should be incubated upright.)
- Incubation Period: 20–24 hours
- After incubation, be careful not to get the supernatant mixed with blood cells and transfer the supernatant to a plain tube.
- Plasma supernatant should be requested for analysis at 2–8℃.
Microbial Test
Gut Microbiome Analysis
- Make sure there are no abnormalities on the cotton swab and take it out carefully to avoid contaminating the surrounding area.
- Expose the anus with one hand and insert the cotton swab with the other hand.
- Insert about 2.5–4 cm and pull it out slowly while turning it towards the rectal wall.
- Check if the stool is sufficiently on the cotton swab, insert the swab in the transport medium, and tighten the lid to make sure it doesn’t get opened.
- If a cholera test is needed in addition, make sure to collect samples on two cotton swabs.
- Keep the sample refrigerated for storage and transportation.
Culture Test for Infection Control
- Swab the air/water and suction cylinder of the endoscope two to three times using a transport medium applied with sterile distilled water to collect the sample.
Water Incubation Test
- Collect at least 5 cc into a sterile container (conical tube) aseptically.
Histopathology & Cytopathology
Handling Tissue & Cell Samples
- Fixation of Samples
- Fixative solution is 10% neutral buffered formalin and 10–20 times the amount of the tissue should be used to completely submerge the tissue and fix at room temperature.
- The purpose of using formalin is due to its excellent sample preservation and to prevent the drying and autolysis of the tissue.
- Solutions other than formalin such as saline or alcohol should not be used.
- If there is no fixative solution, wrap the tissue with a gauze soaked in saline and keep it refrigerated. Then it should be transferred to the fixative solution as quickly as possible.
- If the site of the sample is different, place it in another container for fixation.
- If the site of the sample is different, place it in another container for fixation.
- The opening of the tissue container must be wide and sealed to prevent the fixative solution from leaking.
- Make sure the samples of examinees do not get switched.
- Completing Analysis Request Form
- Check the patient’s name, gender, date of birth, chart number, and the name of the requesting institution.
- Accurately write the sampled area, sampling method, and clinical findings in English.
예시) Stomach,antrum,biopsy; Erosive lesion,R/O EGC Colon, ascending, snare polypectomy; Polyp, R/O Polypoid carcinoma - For the gastrointestinal (GI) tract, resection margin cannot be assessed in the biopsy and forceps polypectomy and is not included in the pathology report.
- Resection margin is assessed in snare polypectomy and endoscopic mucosal resection and is included in the pathology report.
- If resection margin needs to be assessed in other procedural methods, please indicate separately on the request form.
- Record infectious disease, medical history, and anything significant to note.
- Record the number of tissues visually checked on the request form.
- If urgent, please write clearly “Urgent” and the reason for the urgency on the request form and the sample container.
Cytopathology
- Samples for Cytopathology
- Do not use vaginal treatment or contraceptive pills one day before sample collection. Avoid performing traumatotherapy or biopsy before collecting samples as blood will be smeared on the slide which is difficult to analyze.
- Adequate amount of sample must be collected using cytobrush.
- After collecting the sample, evenly and thinly smear on the slide and fix with coating fixation such as 95% ethyl alcohol or cytospray to prevent the cytopathic effect.
- Information including the name of the examinee, number, and requesting institution must be written on the sample container.
- Tightly close the lid of the sample container after collecting the sample to prevent leakage of samples.
- Samples for General Pap Smear
- Fixation for General Pap Smear
- The smeared slide must immediately be submerged in 95% ethyl alcohol and fixed for at least more than 30 minutes.(Do not use methyl alcohol)
- Completely dry the fixed slide and place it into the PAP container for transportation.(There may be a cytopathic effect for smeared slides due to the humidity and formalin)
- It is recommended to add the desiccant inside the PAP container to remove the remaining humidity.
- Discard used 95% ethyl alcohol at every end of the day, and wash and dry the fixation container.
- Before starting the test, add pure 95% ethyl alcohol to the dry fixation container for the slide to be completely submerged.
- Close the lid of the fixation container to prevent 95% ethyl alcohol become volatilized during the test.
- Put the PAP container in a zipper bag, seal it, and then fix it in the baggage to prevent being shaken.
- Please be sure to instruct the above to personnel working on Saturdays or if there are personnel changes.
- Fixation for General Pap Smear
- Samples for Liquid-Based Cytology
- Liquid-Based Cervical Cytology
- Cells from the cervix are collected using a brush with a hysteroscope without lubrication.
- The brush must be discarded after adding it to a container with preservation solution and shaking it 2–3 times.
- Liquid-Based Cervical Cytology
- Fixation for General Pap Smear
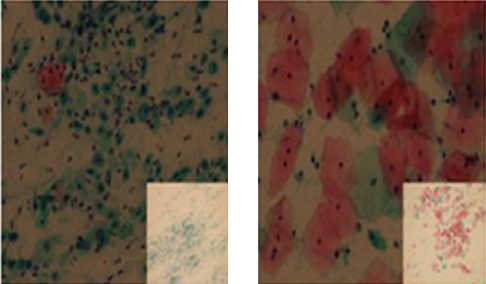
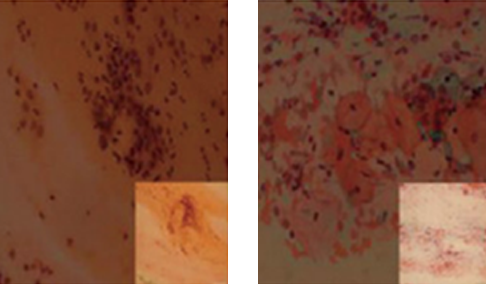
Satisfactory Fixation
Failed Fixation
- Handling Samples for Liquid-Based Cytology
- Gynecological Sample
- Place the sample collected with a brush into the PreservCyt solution container, rotate the brush by pushing at least 10 times so that the brush is bent and spread apart by the bottom surface to wash all samples out of the brush, then discard it.
(Do not put the brush part of the triangular brush into the container.)
- Place the sample collected with a brush into the PreservCyt solution container, rotate the brush by pushing at least 10 times so that the brush is bent and spread apart by the bottom surface to wash all samples out of the brush, then discard it.
- Urine and Sputum
- Place 50 ml of fresh sample in a container for transporting liquid.
- Fine Needle Aspiration (FNA)
- Place the collected sample in the container for transporting liquid.
After aspiration, separate the syringe needle, quickly suck in preservation solution (CytoLyt® solution) in the tube to the syringe, and then inject it back into the tube.
Reassemble the needle to the syringe and gently insert the sample by adhering it to the wall of the preservation solution container. Repeat the inserting process after sucking in the preservation solution again.
- Gynecological Sample
Precautions for Protection of Medical Workers
- Take caution when handling sharp objects to avoid injury. It should be discarded in a sturdy container to avoid contaminating other people.
- Do not bend or break the needle, or replace the syringe stopper. The syringe must be placed in the syringe container after use.
- All samples must be handled carefully as they may carry pathogens that transmit HIV and hepatitis B or C virus via blood. Containers with a well-fitting lid should be used to prevent leakage of samples.
- When requesting for HIV test, samples that are positive or suspicious must be sealed and packaged to prevent damage and leakage when collecting and receiving the sample.
| If punctured |
|
| If stained |
|
| If spilled |
|
| If it gets in your eyes |
|
| If there is a wound |
|
